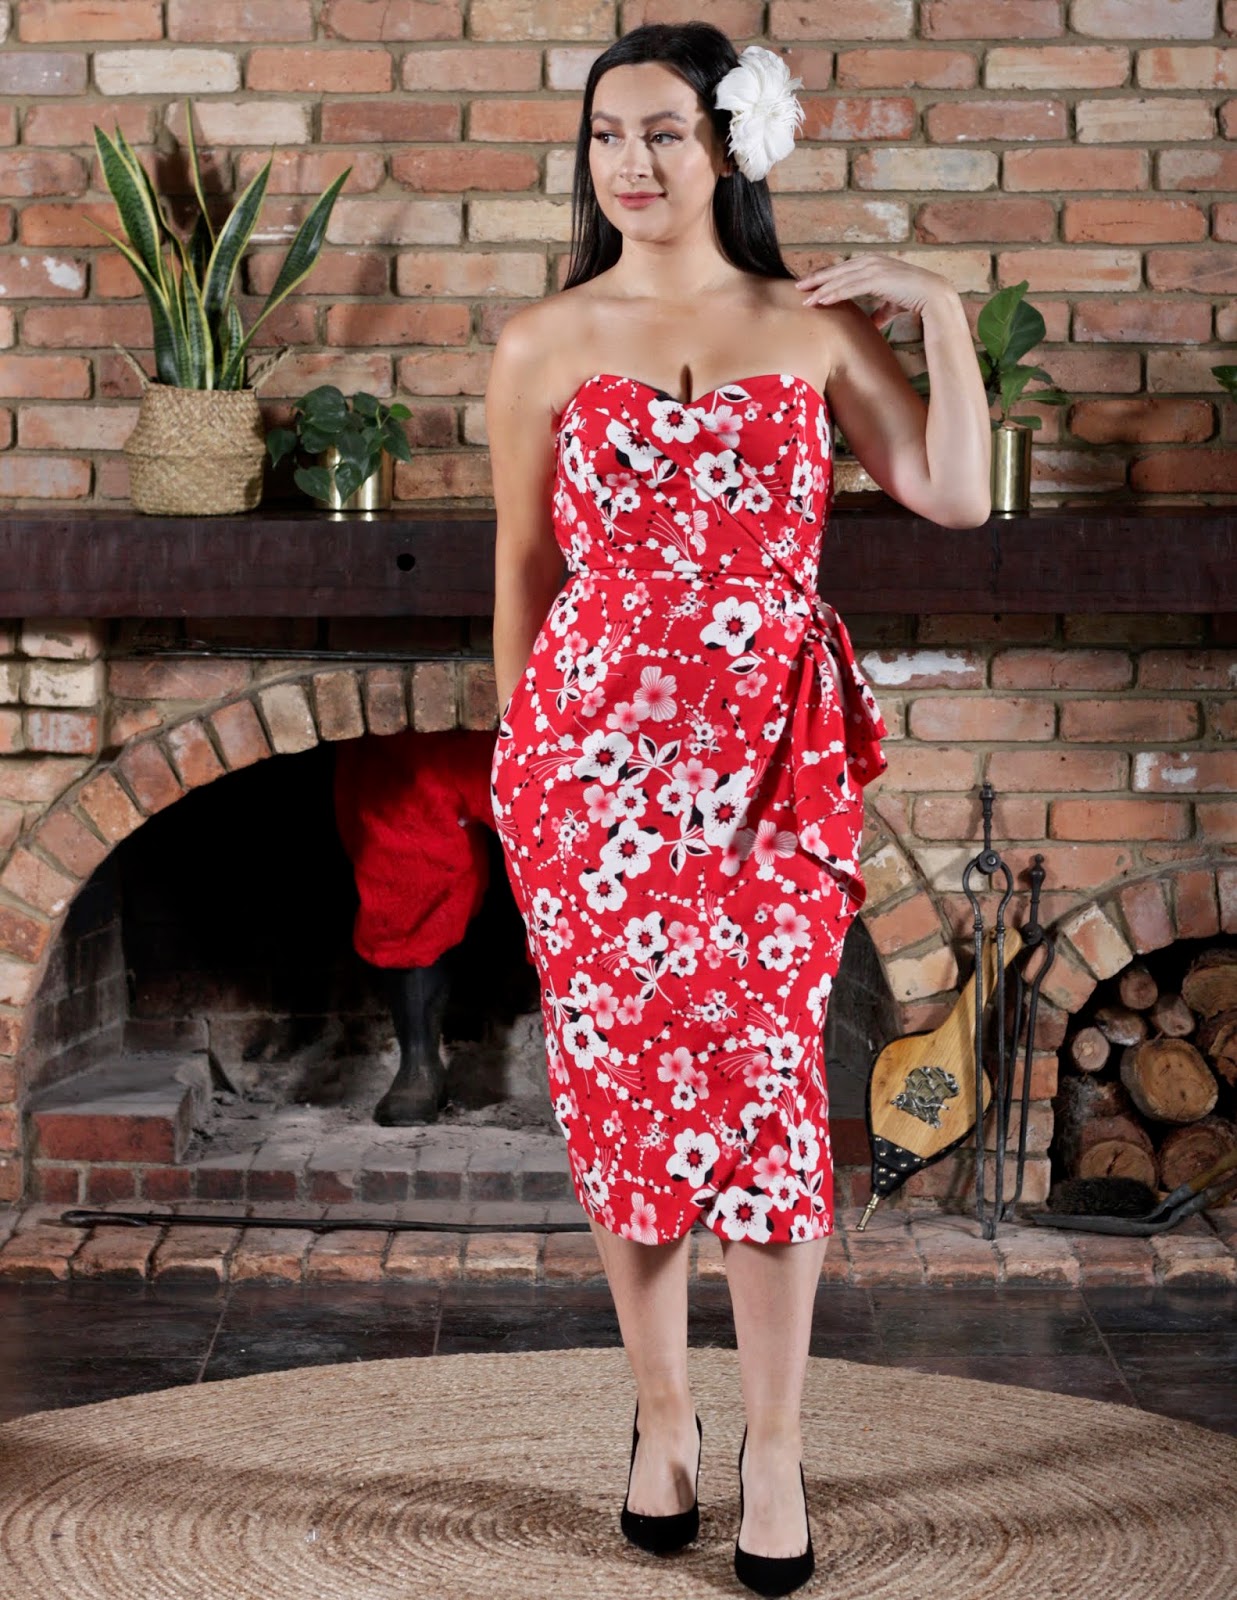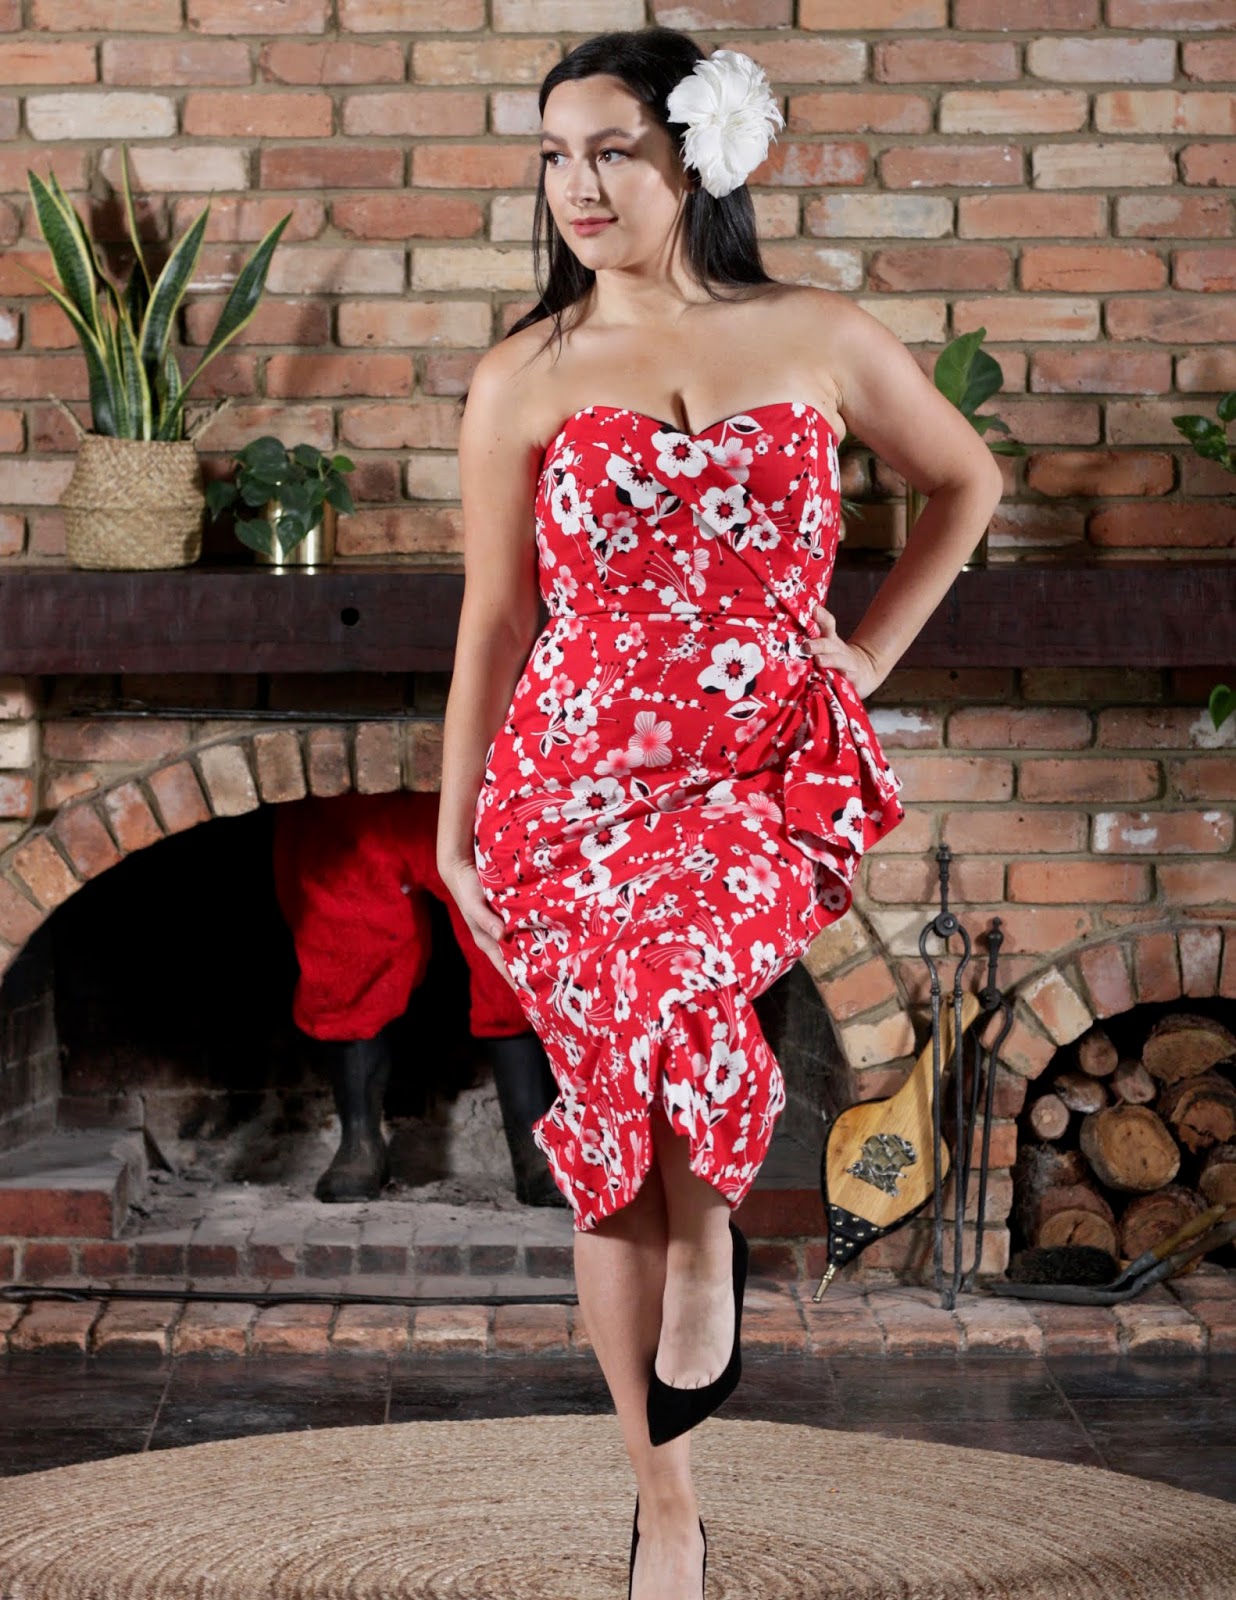
Well look at that, your girl is in a VINTAGE DRESS!
When I first started sewing, my favourite thing to make was vintage dresses. I still dearly love vintage fashion, but over the years my style has evolved with more of a modern influence.
So when Michelle from Sewn Magazine messaged me and asked if I'd like to feature in their fabulous magazine and would I mind making something VINTAGE (and with a Christmas theme!), I jumped at the chance!!
The Pattern
It's the Lamour Dress by Charm Patterns by Gertie. This pattern has recently been updated and expanded, ranging from size 2 (US) to 20 and cup sizes A to H.
With different bodice, skirt and finishing options, there are 18 different dress combinations that you can make with this one clever pattern.
I made the princess seamed bodice with bodice sash, and the sarong skirt.
Sizing
I originally cut a size 10 and after making the toile, went down to a size 8.
As is suggested in the pattern, if you want minimal ease in your dress (i.e. more fitted to the body) it is better to choose your size based on the 'finished measurements', rather than the 'recommended measurements' chart.
I am larger busted but maybe because of my shorter torso combined with a bodice that is strapless and not covering the complete breast area, the A/B cup version fit me well. I find this is often the case when I sew strapless patterns.
I used a beautiful quilting cotton from GJ's Fabrics and the print was perfect for this Christmas themed, tiki style vintage dress!
It was also nice to branch out to more a loud print! I typically sew with solid colours. They're often bright colours(!) but solid, so this felt different for me and I really enjoyed it!
The bodice is underlined with silk organza and lined with a polyester lining.
The Details
More and more these days I get excited by garments that have more engineering and structure on the inside. Typically this requires more time, but I really enjoy this type of sewing and it has never failed to produce a garment that is more likely to be worn and loved.
This dress has a bodice with THREE LAYERS - the garment fabric (the part you see on the outside), underlining (the middle layer) and the lining (the layer that touches your body).
THE BONING AND CHANNELS were attached to the lining layer, which was new for me.
In the past I have placed the channels on the middle layer (the underlining) which is then sandwiched by the other two layers. The result was just as effective in any case.
The hem of this FAUX WRAP SKIRT comes with a HEM FACING which I absolutely love.
The long width of the facing gives the hem body and weight, which is missing from so many modern dresses these days. It also ensures the shape of the hem is exact and not distorted.
The dress is closed with a LAPPED ZIPPER which I think looks so beautiful on a vintage dress, and the lining of the bodice is HAND STITCHED to the garment waistline.
Look Out For
With all the construction and shaping of this dress, it is really important to make a muslin/toile first. You don't want to go to all that effort for a dress that doesn't fit right, and in this type of silhouette, a poor fit is hard to hide.
The instructions for this pattern are wonderful and well thought out, but even still the construction of the flounce and faux wrap can take a little bit to get your head around. Making a muslin means you get to practise the steps without making irredeemable mistakes on the real thing.
Final Thoughts
What an honour and thrill it was to be featured in the Nov/Dec issue of Sewn Magazine 2019!
I'm so grateful to be included amongst such talented seamstresses and thoroughly enjoyed re-visiting my love for vintage sewing!


Absolutely stunning. I have always been a big fan of gertie's patterns and your dress is amazing. So inspirational.
ReplyDelete