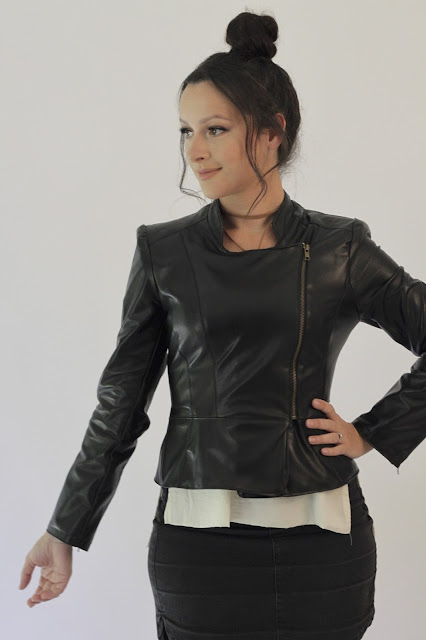
Oh hey, I just made a leather jacket. NO BIG DEAL!
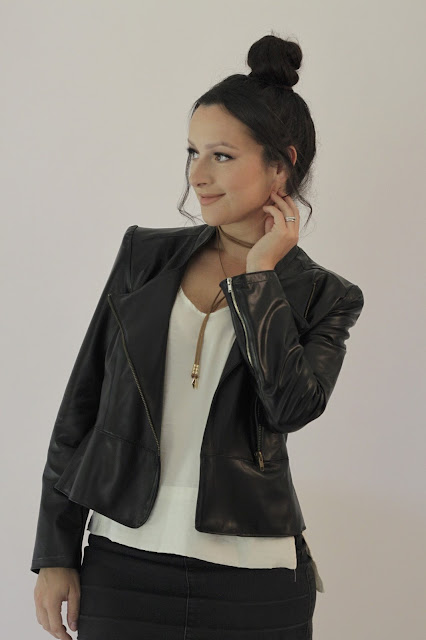
Yes friends, it has always been a rather ambitious dream of mine to make my own leather jacket, and it just got REAL. It's my first time sewing with leather and I am pretty darn chuffed with how it turned out, if I do say so myself!
DETAILS
Pattern
The PATTERN is called 'Biker Style Peplum Jacket' or #108B and it's a print-at-home digital pattern from BurdaStyle.
The pattern doesn't include SEAM ALLOWANCES, which personally I find a little bit annoying as it adds extra time to the cutting out of fabric because you have to add them in yourself. But I know a few people who prefer it that way, so each to their own!
The INSTRUCTIONS are also quite basic as they don't include any images. I managed to coast along with out referring to the instructions, but beginners might find this a bit of challenge.
The pattern itself though is excellent, which makes all the exceptions worth it. It's such a flattering and well balanced pattern and it has already been added to my hall of fame.
SLEEVE TIP - When sewing your sleeves to your bodice, look for the little number '11' notches on the bodice and sleeve pieces: these two have to match up. I spent a good hour trying to work out where my sleeves were supposed to sit, as the sleeve seam lines aren't supposed to match up with the bodice seam lines. I had to reset the sleeve three times before I finally worked it out and unpicking seams in leather is NOT fun.
Fabric
I purchased some beautiful fine BLACK LEATHER HIDES from The Fabric Store in Melbourne. They were about 1mm thickness, which made tackling my first leather project a lot easier.
A special shout out to Katie in the Brisbane store! I had foolishly cut out two arms exactly the same instead of mirrored and I didn't have enough leather to cut out another! Katie hunted down an extra leather hide for me when they had sold out in all their stores in Australia!
I also used a small leather hide that I purchased in Florence, Italy back in 2013 when I first conceived the idea of sewing my own leather garment. The black matched well and I used it for the collar and the under sleeve.
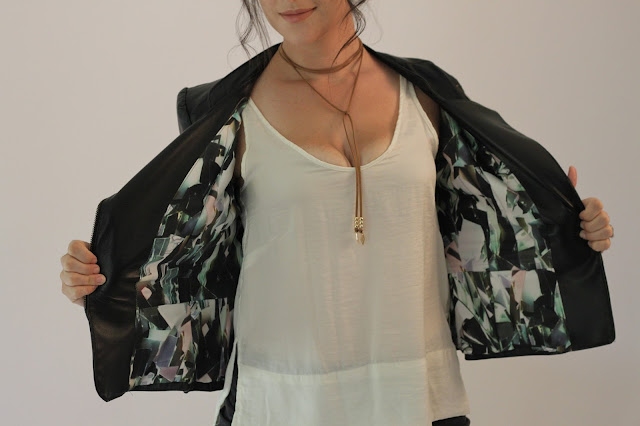
Remember this dress I made in this amazing SILK FABRIC I made a zillion years ago? Well I had just shy of a metre left which I'd been hanging onto for a rainy day, and I managed to use it to make the lining for the jacket! It's a beautiful silk from Tessuti Fabrics, which is heavy enough for a jacket lining and goes so well with the black leather.
Changes
Are you ready for this one? I made zero changes to the actual pattern pieces. ZILCH! That is pretty darn cray-cray for me. All patterns, no matter how good they are, require a bit of tweaking here and there to get the fit right. This was just one of those crazy miracles where everything just WORKED.
Of course I cut a muslin of the bodice first, but liked how it looked so went straight into cutting the leather.
A big change though is I went down a few SIZES. My waist and boobs were measuring around about a size 42 (the pattern comes in sizes 34-42) but I wanted a really form fitting look so I took a risk and cut the size 38; a pretty big difference! I've learnt in the past that jackets can look nicer when they're a little bit smaller, as they tend to be worn open. I have little arms so the size was a true 38; that's one area that you definitely don't want smaller than what you measure.
I also forgot to add 4cm to the HEM of the jacket and sleeves and did the standard 1.5cm seam allowance (curse you no seam allowances!) so the inside facing of the hems is a little shorter, but it still looks good.
I didn't INTERFACE any of the instructed pieces as the leather had enough strength and I wanted to minimise bulk.
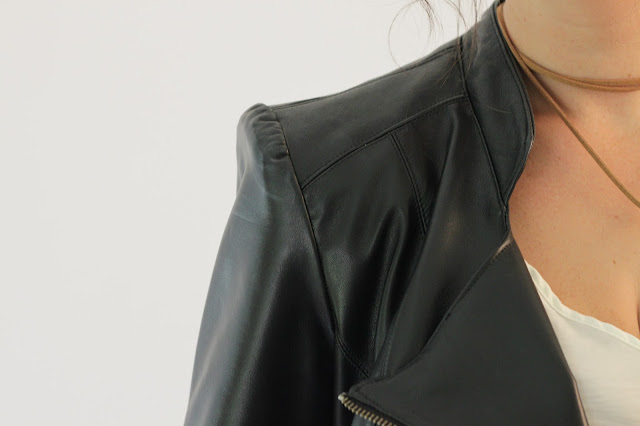
I also added SHOULDER PADS to the pattern and I'm so glad I did, as I love how finished it makes the look! It also helped 'push out' the sleeve head easing and really compliments the proportion of the jacket.
Zippers
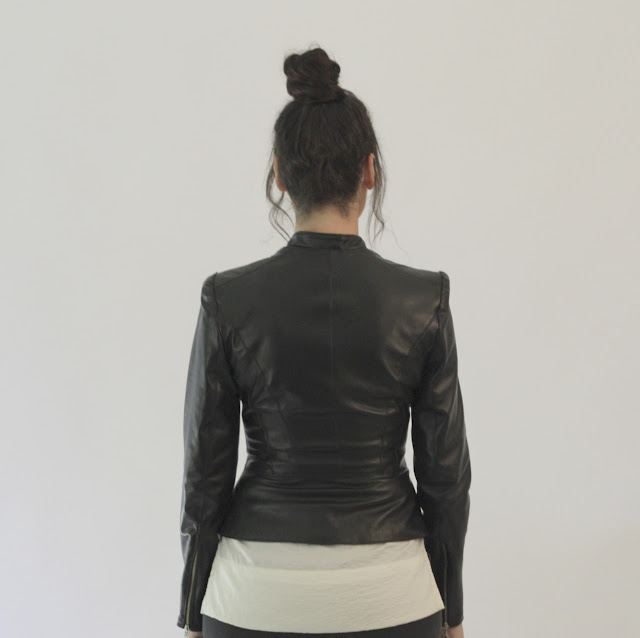
This was actually really fun. I love how much a metal zipper is not only functional, but really adds to the look of the jacket. The zippers on the sleeves also mean that you can get a really close fitting sleeve.
My front separating zipper was too long, so I pulled out the excess teeth at the TOP of the zipper with pliers (which is immensely satisfying, I don't know why) and then re-attached the zip stoppers with pliers and a little bit of instant glue. Made me feel so darn accomplished!
My sleeve zippers were a little bit shorter than what the pattern called for - that's all they had in my local store - but it didn't detract from the look at all.
Love
No matter how awesome the bodice of a jacket looks, if the SLEEVES are bad everything looks bad. The sleeves on this pattern are perfection. They are in two pieces, slim fitting and a nice long length.
I love the stand up COLLAR on this jacket. It's simple and understated but looks so awesome.
The PEPLUM is such a nice length and not too flouncy. It gives a nice shape to the jacket and makes the waist look smaller.
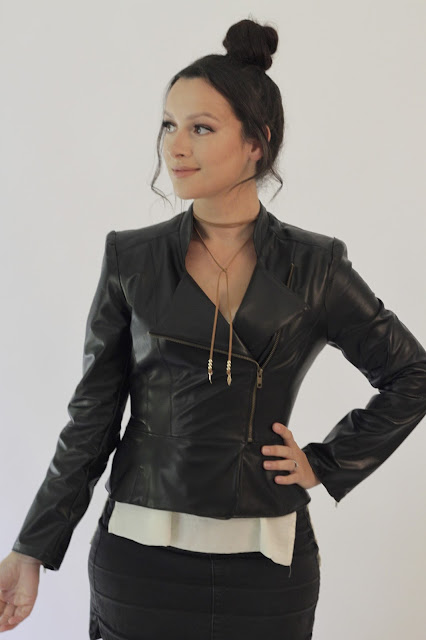
The FRONT CLOSURE with the zipper in the seam line is genius. Such a nice shape and looks really nice when the jacket is opened.
Speaking of openings, this jacket looks so nice WORN MANY WAYS.
 |
| Fully zipped |
 |
| Half unzipped - one lapel down |
 |
| Half unzipped - Both lapels down |
 |
| Fully unzipped |
TIPS FOR SEWING WITH LEATHER
- PINS are the mortal enemy of leather. Make sure when you're sewing pieces together you only pin within the seam allowance or you'll end up with some obvious little holes along your garment.
- STICKY TAPE is your friend! - I'm sure there's a better way, but when cutting out my leather, I attached all the pattern pieces with strips of sticky tape! The sticky tape being not super tacky, held the pattern piece perfectly, and made no marks on the leather when removing it; WIN! Sticky tape also held down my hems while I hand stitched them in place.
- Take the time to double up on PATTERN PIECES. For all the pieces that require two pieces, trace out a second pattern piece (make sure it's a mirrored copy of the original!!). And for all the 'on the fold' pattern pieces, cut out a second mirrored one and join them together to make one piece. Yes it's more time consuming, but it means you can fit all your pieces down on the hide and see exactly how much space you have. Also leather is too thick and moves around too much (especially when you're not using pins!) so you don't want to fold it in half when cutting out pattern pieces. It is best to cut out individual pieces on the right side. It also means you can clearly see any imperfections in the leather when you're cutting out.
- I'm probably going to get in trouble with someone over this, but I paid no mind to GRAIN LINES when I cut out my leather because this stuff is not woven fabric. I just moved my pieces around to where ever they fit best and went for it! Do avoid the corner sections as those sections are the softest and stretchiest so not as durable.
- Use a LEATHER NEEDLE! I used a size 14 and it got me through the whole garment without snapping. It's pointier so it makes it easier to get the thread through the fabric. If you're feeling rebellious and don't want to purchase a leather needle, just make sure you change your needle to a new one as a blunt needle will do damage to your leather.
- TOP STITCH EVERYTHING! And I mean everything! When you first sew two pieces of leather together, the leather curls at the seam and makes the seam line look bulky. Ironing is basically useless when working with leather, so I would open out the seam allowances and then top-stitch the seam allowance down. It completely transformed the seam and makes it look finished and professional.
- THIMBLE is a must when hand sewing your leather hems to the lining. Have you tried pushing a needle through leather with your finger? It hurts. Trust me.
- THREAD LENGTH - I changed my thread length on my Janome from the standard 2.4 (which I basically use on everything) to a 3. The thickness of the leather requires a slightly longer stitch; having a stitch too tight and close together could end up tearing the leather.
- LEATHER MOVES - I found that when sewing two pieces together on my machine, the top layer of leather moved a lot under the sewing foot. I learnt to get a good grip on my fabric from the front and back as I sewed, but you can buy special sewing feet to stop the fabric from sliding away from each other. I will definitely do this for my next leather garment.
Conclusion
I'm so pleased with how this jacket turned out; I think it might actually be my favourite thing I've ever made! I have already started fantasising about making another in a different colour; jackets just get so much use!
I finished this jacket in time to wear it to Melbourne Frocktails recently, organised by the wonderful Kat from All The Whimsical Things , Renay and Libby.
Here I am posing for a photo with the lovely Nichola from Handmaker's Factory and Leisl from Jorth. Hanging out with like minded women who have made their own clothes is inspiring to say the least. It's probably the only group of people I know that don't mind you feeling them up before you've even asked their name.
xxx







This has got to be one of the best garments out there in sewing-blogs, I for-see many leather jackets cropping up online in 2017! You have done a great job on construction and the fit and style looks great. Hot!
ReplyDeleteOh Naomi, how I love you! Thank you so much for your kind and generous words!!
DeleteThis is amazing! I did glimpse it it in real life at Frocktails and was immensely impressed! so glad you love it!
ReplyDeleteThank you so much!!! Xxx
DeleteWow! Your jacket is fabulous. Very jealous.
ReplyDeleteHahah! Thank you lovely lady!! You should make one too!
DeleteAhmazing!!! I was lucky enough to see this irl and your sewing is perfection. Soooo soft too . Well done!
ReplyDeleteThank you Helen, Goddess of style! 😍
DeleteThis jacket blows my mind. It's perfection! Clover wonder clips are a good substitute for pubs when sewing with leather.
ReplyDeleteOh wow, great tip!! I've never heard of these before and now I won't rest until I own them! Will definitely use for my next project. Thank you Anna!
DeleteIt's just so beautiful! I love everything about it and it looks fantastic on you. Thanks so much for sharing this. I'll add it to the "one day I'd like to" pile in my head.
ReplyDeleteThank you Rory for your kind words!! Make sure you add it to the lost; you won't regret it!
DeleteAmazing! I may definitely have to copy this with my own spin! Thank you for all the great tips too. I also love your necklace - do you mind if I ask where that is from?
ReplyDeleteThank you very much!! 😁 I got the necklace cheap at a store in Melbourne called 'Forever New' 😁
DeleteThis is the nicest homemade garment I've seen in a long time. Well done it looks incredible
ReplyDeleteAmy that is one of the nicest things you could say to me; thank you so much!
DeleteFan bloody tastic jacket!!
ReplyDeleteI could add a few thoughts on sewing leather though I only used it for the zipper bands on my Cascade coat. It can totally be ironed and can even be used with fusible - just use a protective cloth.
The strongest part of the leather is down the spine, the weakest/ stretchiest is around the edges/belly, so good for a sleeve cap if you need to ease any excess.
Have you ever tried sticky tape under your machine foot, I've heard that makes the stickiness of the leather glide under your foot more easily. I have a teflon coated Bernina foot and the coating disappears before my very eyes, so might have to try this myself!!
So inspired to use the suede I bought from NSW leather for a jacket and totally concur with jacket fit needing to be snug, unless you need to wear a big wooly jumper under for warmth I suppose!!
Terrific make Julia.
Oh my goodness, fantastic tips! Thank you so much! I love the idea of using the stretchy bits as the sleeve caps; I wish I had thought of that before I tackled those sleeves. That would have helped so much!
DeleteThank you so much for your kind comments :)
This looks absolutely amazing!
ReplyDeleteAw, thanks so much Kate! Much appreciated!
DeleteI love this jacket. It looks so good on you!
ReplyDeleteYou are too kind! Thank you!
DeleteI love this jacket. It looks so good on you!
ReplyDeleteSo well done! Looks fantastic. And a little leather jacket like that must be perfect for Melbourne, both style and weatherwise.
ReplyDeleteI'd been eyeing that pattern but never imagined it could work this well!
And you've given me some courage to try my own jacket (Out of velvet!) in a different pattern I've had in my stash for years. If it turns out anywhere near as good as yours I'll be very happy :-)
Thank you so much! Ooh Ooh PLEASE make a jacket out of velvet! It's something I've always wanted to try too! It'll look fantastic!
DeleteThanks so much for your kind feedback :)
Hehe ok! If I manage it I'll be so excited I'll be pasting it all over my sewing blog :-D I'm hoping to go to Tasmania in late summer/early Autumn and need a light jacket ie velvet. (Still taking my heavy wool winter coat, Tassie can be freezing even in summer, I know from past experience!)
DeleteHaha! Oh awesome; thank you!
ReplyDeleteAmazing jacket! I like it!
ReplyDeletelivelovelook.ru
Julia, how absolutely darling you look in your leather jacket! Both are wonderfully made! Thanks for the lookie.
ReplyDeleteOh my gosh. This is beyond fabulous!
ReplyDeleteYou must feel so proud to wear this fabulous jacket! A thing of beauty it is;) You look amazing too btw Julia!:) What a great tip, using tape to hold hems! Maybe next Spring I might venture into sewing a real leather jacket!! I'm definitely inspired:):)
ReplyDeleteP.S, you always have such beautiful blog photos!:)
DeleteWow this is gorgeous! Great job - I love it! I'm scared to sew leather and worried it will damage my machine, how is your machine afterwards?
ReplyDeleteThis is really amazing! You did such an amazing job. I'd love to sew leather but I'm scared for my machine.
ReplyDeleteThis is blooming amazing! Looks incredible!
ReplyDeleteStun-ning! I've seen it on your twitter, but it looks even better here, and I love the tips! You make sewing everything feel super-easy (which I think may be misleading ;) )
ReplyDeleteWowza, this looks great! Nice work!
ReplyDelete